Follow these steps to successfully
install shopGURU® for your business.
shopGURU is Windows-based software. It requires the installation of the ShopGURU Server Application and the ShopGURU Client application.
The ShopGURU Server Application will be installed on a Network Windows Server. The ShopGURU Server stores the shopGURU database.
The shopGURU Client Application will be installed on devices that will access and manage the shopGURU database and is used by your staff.
Take these steps for first-time installation and to setup your User Accounts.
Step 1: Download and extract the Installation File
Step 2: Install the shopGURU Server Application
Step 3: Install the shopGURU Client Application
Important: Your Server must be connected to the internet when shopGURU runs to check for the license validity.
You can install shopGURU on as many devices as needed. The number of seats you purchased will determine how many concurrent users can log in to a shopGURU client device. All Client Devices must be connected to the Server Device to run shopGURU through your local network.
Install the shopGURU Server Application
1. Double-Click on the ShopGURU Server Installation file and follow the Setup Wizard.

2. Double Click on the ShopGURU Server desktop icon.

3. Click on Install ShopGuru Service.

4. Once the service is installed, click on the gray OFF button and wait for shopGURU Service to start.

5. When the Service is ON the gray button will turn Blue. You can now minimize the window. The shopGURU server is setup.

6. Locate the IP address of the device where the server is installed. Type ipconfig in the Command Prompt Window and save the IPv4 address. This address will be used on the shopGURU client application.

Install the shopGURU Client Application
1. Install the shopGURU client application on all devices used to manage the data. Using a tablet will allow your team to take photos at the machining center.

2. Double-Click on the ShopGURU Client Installation file and follow the Setup Wizard.

3. Double Click on the ShopGURU Client desktop icon.

4. Enter the server host name or the IP address you saved in step 6 above and click save.

For the first-time use type:
User Name: Admin
Password: Welcome1
(password is case sensitive)
Error message “Login failed. No license available” will appear. Click OK.

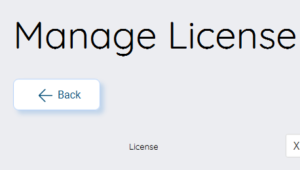
5. Click on the Admin Button, then click Manage License.

6. Type in your new License Key and click Verify. Your Company Name and License Info will appear.
Click Save.

7. Click back to go to the Admin Page and click Manage User.

8. Click on Create User.

9. Create a new user with Admin User Role. The password is case-sensitive.

10. Click Back and Logout.
Now you can log in with your new username and password.
You are ready to use shopGURU!


0 Comments